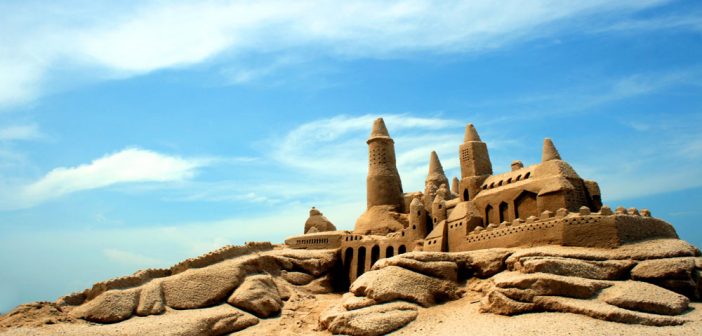
We have all had this fantasy: we go to the beach, we spend a few hours in the sun, and then we build a sand castle that looks like it was sculpted by the gods. Well, as it turns out, getting sand to adhere to your architectural genius is more difficult than it seems. Before you resign yourself to a wet lump of sand with a stick in the top consider these great tips from the sandcastle professionals.
Assemble Your Materials
All these can be found at any dollar store in the summertime.
Buckets are vital for hauling water to dampen your sand and for condensing the sand into tightly packed cylinders. Consider how big you want your sandcastle to be before you buy the buckets.
Small buckets are perfect for a smaller (and less time-consuming castle) and are easier for little hands to carry but big buckets make short work of a large castle wall and can haul much more water in less time. Additionally, make sure that the handle on your bucket is sturdy, and not cheap plastic, otherwise, you may end up dropping a bucket full of water or sand right on your foot! There are a great variety of buckets out there, and even quite a few that shape the sand into perfect castle towers/turrets for you.
Hand shovel (or two, or even three, depending on the number of builders) to make short work of a moat, the packing of walls, and to help even out the foundation before you begin building on top of it. Shovels are also great for digging deep in the sand to find the best seashells!
A spatula is an unexpected but very handy tool to have for packing walls, smoothing out surfaces, and creating defined edges and lines.
Plastic flatware helps to add the details. Plastic knives can carefully carve away at windows and turrets or create brick-like markings on the outside of the castle.
Spoonscarefully remove small amounts of sand from windows and doorways without destabilizing the entire structure.
Plastic straws are perfect for the perfectionist who cannot stand the sight of loose sand near their castle. Blow gently through one end of the straw to clear away debris made by making windows, doorways, and turrets.
Draw up the Blueprints
When beginning a large project with a group it is important to define the parameters beforehand so that you don’t end up with three people all making an entrance when they should be making supporting walls.
Use your shovel to carefully flatten the sand that you want to use as your foundation. Be sure to begin your project well out of the reach of the waves and on even ground for the most stable structure.
Use your plastic knife to draw a clearly defined border, entrance, and (if desired) moat. Once it’s clearly visible in the sand you won’t have to worry about anyone digging or building in the wrong spot.
Gather sand in the center of blueprint drawing.
Shovel until your outline is nearly overflowing with sand. Make your pile of sand much higher than you want your castle to be because you will be carving out a lot of that sand to form the shape of the castle.
Create Building Strength
Use your shovels to pack the sand around the edges of your mound forming four walls surrounding an empty bowl. Fortify the walls by using the sand in the middle to build them thicker and higher. Keep packing the sand until the four walls are as tall as you want the castle to be.
Add Water
Add water slowly from all sides as if you were creating a little kiddie pool out of the sand. Stop to reinforce the walls if you find that the water leaks out. Once it is ¾ full of water begin adding sand and stomping around to mix it together. Be careful not to stomp on the walls! Proceed to step six once the sand and water have been well-packed and form a cube-shaped mound.
Begin Carving Out the Walls
Use your spatula to carve out your four castle walls and to even out the top of the mound so that it can support towers.
Add Turrets
Mix water and sand in a bucket and pack it tightly to start adding turrets/towers. Make sure it’s not too wet or too dry or it will fall apart quickly. Level off the sand in the bucket using your spatula and quickly turn it upside down on top of the sandcastle wall. Tap the bucket gently on top to loosen the sand then pull the bucket straight up to leave a perfect cylinder behind.
Add Details
Use your plastic knife to mark bricks in the castle wall or to carve out the “crenels” (the uneven tops of turrets). Before carving out the crenels use the knife to mark where to carve so that you don’t end up with any uneven pieces. Use it again to mark out windows and entrances, then switch to your spoon to carefully remove the sand. Consider adding an arched doorway, a ladder, or a tall tower with a single window for an imaginary prince or princess to look down from.
Remember to have fun, at the end of the day, the castle will be washed away anyway, there’s no need to stress over a collapsing tower or a stepped-in wall. Enjoy your creative time at the beach.
Like most things, practice makes perfect, so put together a sandcastle building kit in a large bucket or tote bag and be sure to take it with you every time you go to the beach. Explore everyone’s creative ideas; you never know which will turn out brilliantly! When all is said and done be sure to take lots of pictures with your sandcastle and the team that put it together. Your sandcastle may not last but the memories you made while building it will stay with you for a lifetime.


