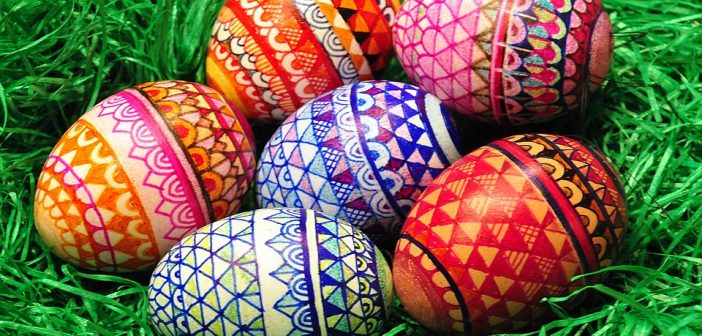
Dyeing eggs has been an Easter tradition for years. While it can be a lot of fun to use the tradition methods, sometimes you want to spice it up and find new ways to make even more designs on your Easter eggs. Here are seven alternative ways for decorating your eggs this year. Most of these are so easy even the kids can do it with you.
1. Marker Eggs
One of the simplest alternatives to the traditional dye is doodling on your hardboiled eggs with permanent markers. By using markers, each egg has your own personal touch. Rather than the simple, solid colors of tradition dye, your eggs can have flowers, scenery, or anything else you can think of. This is also a great, mess-free way for your kids to express their creativity when coloring eggs.
2. Foil Eggs
This method leaves your Easter eggs with a metallic look, unlike anything you can make from tradition dye. The technique is simple too. All you have to do is cut out a circle of aluminum foil and wrap it around the egg. To get it smoothed down, use a hard tool like a butter knife or the handle of your paintbrush to rub over the egg. Just be careful not to crack the egg.
Once the foil is all smoothed down, you can use some regular acrylic paints to make whatever design you want to add a bit more flare to the foil look of the egg.
3. Shaving Cream/Whipped Cream Eggs
There are two ways you can do this type of egg dyeing, but they get similar effects. You either put shaving cream or whipped cream on a cookie sheet, add a couple of drops of food coloring (use as many colors as you want), and then use a straw or toothpick to mix the colors in the design you want.
By simply drawing a few lines through the coloring and then sticking your egg in it, you can end up with a tie-dye design. The best method to coat the egg is to gently roll one side of it in the cream and then flip it over. After letting it sit for ten minutes, you can rinse it off and see what design you ended up with.
4. Water Marble Eggs
Water marble is a widely popular DIY trend for decorating your nails. This egg dyeing idea puts a new twist on that concept, and the best part is almost anyone can do it. You’ll need water, nail polish, a cup or bowl, a toothpick, and of course, the hardboiled eggs.
Just like the nail method, you put a drop of nail polish on the water and add any other colors you want on top of that. After the polish has spread a little in the water, you use the toothpick (like with the shaving cream/whipped cream eggs) and put the design in the polish to get whatever swirl or effect you can create. Simply dip the egg in the polish, use the toothpick to clear away the excess, and pull it out to dry. When you’re finished, you’ll have an unique water marble effect. You can even dip different sides of the same egg to layer the designs.
5. Paper Eggs
This one may not sound very exciting, but the finished look can be beautiful with the right materials. There are two different designs you can go for.
The first is using paper napkins with pretty designs on them. You can usually separate the top layer of the napkin with the design from the plain bottom layer. To make the napkin stick, you put it on the egg and brush lightly-beaten egg whites over the napkin to smooth it down. When the whole egg is covered, cut off the excess and enjoy your beautiful egg.
The second method is to take pages out of old books, and using glue in the same method as with the napkin, brush it onto the egg for a bookish or vintage look. You could even use fake eggs for this design to keep your decoration around for several years.
6. Silk Fabric Egg
This is a fairly popular egg dyeing method on the internet, and it can leave you with some of the brightest designs if done right. One of the ways to do this is to find 100% silk fabric like a tie or handkerchief (about 9×9” should do for each egg), wrap the egg so that it’s touching the brightest side, and then use a rubber band to tie off the top of the fabric.
Once you’ve wrapped all the eggs you want, line them up in a pot and add water. Put about 1/4 cup of vinegar in before bringing them to a boil on your stove. Leave them in for 20-25 minutes before removing them and letting them cool on a towel or colander. Once they’re cooled, you can remove the fabric to see your decorated eggs.
7. Bejeweled Eggs
These eggs are probably best done on fake or plastic eggs so you can keep your hard work for longer. Though it may be time-consuming, there’s nothing more to it than hot-gluing rhinestones or sticky gems to your egg. You can create whatever design you’d like for a dazzling egg. These make beautiful decorations that any bling-lover will like to show off in their home at Easter time.
As you can see, there are so many unique ways to decorate eggs. Use your own creativity this year to put a new twist on this old Easter tradition.


