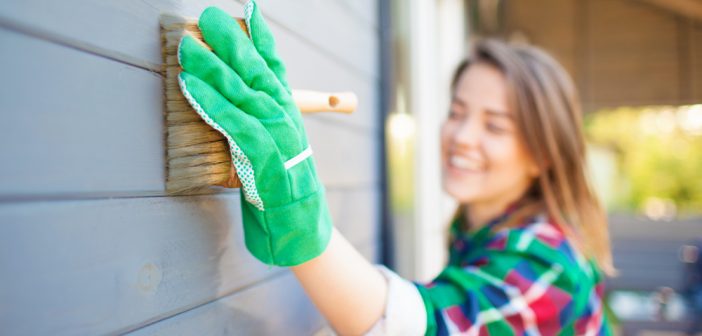
Nothing makes a more immediate impact or adds appeal to your home more than its exterior paint. When applied the right way, it not only adds personality and beautifies your home, but it shows true pride of ownership as well. From prepping the exterior of your home and choosing the right paint to proper application techniques, our expert tips will make painting the exterior of your home a breeze.
Tip #1: Only Paint During the Right Time of Year
When painting the exterior of your home, it’s important to plan ahead and consider the weather patterns of your location. Since paint won’t adhere to wet surfaces and needs time to dry, choose the driest time of year to roll up your sleeves and pick up a brush.
Tip #2: Select Quality Exterior Paint
A quality exterior paint should be 100 percent acrylic latex, which consists of three primary components:
- • Pigments
• Binders
• Solvents
Pigments obviously provide the color, while binders bind the pigment and solvents allow the paint to spread. When paint begins drying, the solvents will evaporate and leave the pigments and binders behind. These are referred to as volume solids. Premium quality paint typically has a higher percentage of binders and volume solids than budget brands, improving its durability.
Tip #3: Prep Your Landscaping
After purchasing paint and painting tools, most people jump right into prepping the exterior of their home and neglect to prep their landscaping. Painting can be messy, so make sure to cover the ground and any vegetation near the exterior of your home.
Cover up the AC unit, grill, and any outdoor furniture as well. Drop cloths are relatively inexpensive and go a long way in protecting any and everything from paint spills and splatters. If not you can use a tarp or plastic sheeting.
Tip #4: Prep the Surface
It’s tempting to pick up a brush and start painting right away. However, if you want your home to look like it was painted by a professional and not an amateur, prepping the exterior of your home beforehand is a must. Paint will only adhere to clean, dry surfaces. Thoroughly pressure wash the exterior siding and trim and let it dry. Then, sand or scrape any peeling paint, this will create a clean, solid surface for your paint to stick to for years to come.
Tip #5: Patch and Seal
Rotten siding and paint don’t mix. Replace any rotten siding or wood trim with fresh lumber or other materials beforehand. If only a small area is rotten, wood hardener and wood filler can be used. Remember to sand them beforehand to ensure an ideal painting surface. If you have a stucco home with chips, use new stucco to help patch them. When done, let it sit for few days before grabbing your paint roller.
Tip #6: Don’t Forget the Primer
For the best painting results, apply a primer prior to applying the paint. A quality sealer with high resin content works best. Apply it directly over old paint, it will lock everything in place and help promote maximum paint adhesion. If the exterior walls of your home have become dusty or chalky, opt for a chalky wall sealer. If you have a newer home with wood or vinyl siding, latex primer usually works best. For stucco homes, apply hot stucco primer, which will speed up the drying process and allow you to begin applying paint as soon as it dries (just remember to let the stucco cure before applying it.)
Since different primers and sealers have different drying times, check the label to determine how long you should wait before applying the paint.
Tip #7: Mix the Paint
After opening up a can or bucket of paint, mix it thoroughly with a wooden dowel, paint stirrer, or an electric drill with a mixer attachment. Doing so will blend all of the oils into the paint and get out any clumps for a nice smooth finish. If you have multiple cans of paint, mix them together into a five-gallon bucket or another large container. This process is used by the pros and referred to as “boxing the paint.” By mixing different cans of paint together, you’ll help ensure a uniform color.
Tip #8: Start at the Top
When applying the paint, start at the top (just below the trim or roofline) and work your way down to help prevent streaking. Unless you’re using a professional sprayer, drips are an inevitable aspect of painting. However, this method will easily control streaks and feather out any drips or mishaps.
Tip #9: Add Grit
If you’re painting steps or porch floors, paint can be slick and result in slips and falls. To solve this problem, mix a little sand into the paint in order to add traction. You can use any type of sand, but many manufacturers make special additives for extra texture.
Tip #10: Seal the Cans
Painting the exterior of your home can be a time-consuming endeavor, especially if it’s your first time. You may need to stop and finish up the next day. If this is the case, properly close and seal your paint cans or buckets to keep the paint from drying out.
Use a rubber mallet or hammer to secure the lid and make sure it’s shut. Add plastic wrap over the opening beforehand to help ensure an airtight seal.
Painting the exterior of your home yourself can save you thousands of dollars, but doing the job right requires patience and know-how. Our expert tips will make painting the exterior of your home easy and result in a beautiful, professional-looking paintjob that will last for years.


