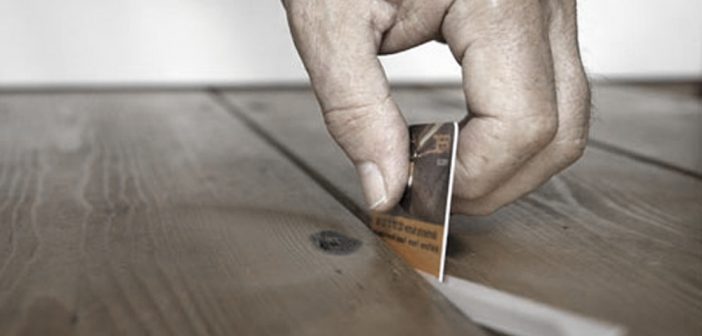
Hardwood flooring is a way to add beauty and style to your home, which helps to explain its popularity. Once it’s installed, though, you may have noticed that gaps start to appear when the weather cools down. While small gaps are normal, wider gaps become havens for dust and dirt. Those wider gaps also lead to drafty conditions in those cold winter months. Fortunately, there are some steps you can take to guard against hardwood floor gaps.
Wood Selection
Different kinds of wood react differently to changes in moisture. The amount wood shrinks or expands in response to changes in moisture is called stability. As a general rule of thumb, woods with higher stability will create smaller gaps in response to seasonal changes. Woods like red oak, hard maple and white ash, for example, are frequently used as flooring because they have good stability. Some exotic hardwoods do have higher stability and may withstand changes better, but these woods are often prohibitively expensive compared to domestic hardwoods.
Board width also matters. Let’s say you’ve chosen oak as your wood. You can either install 2-inch boards or 5-inch boards. Both the 2-inch and 5-inch boards will have approximately the same percentage of shrinkage. Since the 5-inch boards have so much more material, however, they’ll appear to shrink more and leave bigger gaps. If you aren’t sure which woods and sizes will perform best in your region, you can always consult with a contractor or flooring expert.
Acclimatize the Wood
The moisture content of the wood itself can lead to gap formation. This happens in one of two ways. In the first scenario, your wood’s moisture content is too high on delivery. The flooring gets installed and the wood continues to dry. Gaps appear as the drying process leads to shrinkage. In the second scenario, your wood is too dry on delivery. The installed flooring absorbs moisture and tries to expand. Since the boards were installed without gaps, the wood fibers on either side get compressed under pressure. This permanently damages the fibers. When the wood shrinks due to seasonal changes, the damaged fibers don’t expand all the way. Again, you wind up with gaps.
You can prevent both of these problems with a process called acclimatization. Rather than installing the wood flooring immediately on delivery, you leave the wood in the room for approximately two weeks. This gives the wood a chance to adjust to the moisture and temperature conditions where it will be installed. After two weeks, it should reach the correct moisture content. You should see far smaller and fewer gaps after installation.
Maintain Steady Humidity and Temperature
Have you ever been to a house where the front door sticks in the summer, but seems to work fine in the winter? That is how humidity and temperature affect wood. Heat and moisture make the wood expand. Cold and dry make it contract. Left unchecked, this process of expansion and contraction can damage wood so severely you’ll need to replace it. At the less drastic end of the spectrum, you’ll have to deal with gaps.
Maintaining steady humidity and temperatures are your best bet to minimize gaps. The ideal range for humidity is no more than 50%, down to about 30%. The ideal temperature is around 60 degrees Fahrenheit up to about 80 degrees. The humidity range keeps the moisture level in a sweet spot that doesn’t dry the wood out, but also doesn’t let it absorb too much moisture. The heat range doesn’t let it get hot enough to make the wood expand too much, but keeps it warm enough to prevent the wood from shrinking much.
Installation
Installation is one area where you can exert substantial control in terms of preventing gaps. If you’re using engineered wood flooring, a visual inspection should alert you to any noticeable flaws in the wood. Every piece should, with the exception of grain pattern, be functionally identical. Set aside any pieces you see that look narrower than the other boards or that look misshapen. These pieces can often be cut down and used in less visible areas, such as closet floors.
If you’ve secured solid hardwood from a retail outlet or lumber yard and milled it down yourself, it can be trickier to spot flaws. Check the width of the boards with both a tape measure and against each other to make sure they’re close to identical. Before securing the boards to the floor, place an edge that you know is straight against the row of boards in different spots. The straight edge should fit snugly against the row with no gaps and no rocking.
While small gaps in your hardwood floor are inevitable, you can guard against the worst of them. Choosing a wood with high stability and smaller widths automatically reduces shrinkage and expansion. Allowing the wood time to acclimatize at the right humidity and temperature means it will be installed at a more stable moisture level. Taking care during installation not to use damaged, misshapen or poorly sized boards helps you avoid creating gaps yourself. Maintaining that humidity and temperature will limit seasonal expansion and contraction. Putting all these safeguards together helps to prevent unnecessary gaps and will extend the functional life of your flooring.


